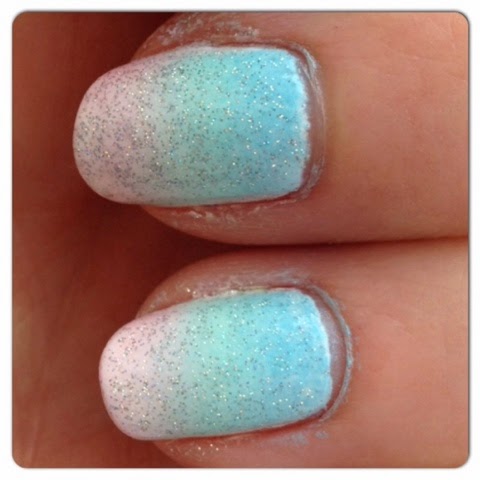
For this week I wanted to create a nice pastel gradient nailart. I always love gradient nailarts, because they are so beautiful and look like you have put a lot of effort in it, while in fact it is very easy to make if you know how to do it. Don't know how to make this?? Then keep on reading...
 |
| Final result |
 |
| Close up |
First I find it a lot more easy to gradient my nails when I first put on 2 coats of white (OPI Alpine snow). This is a good base and the colors will look much better. Then take any kind of sponge, I used a make-up appliance sponge with a flat surface. Than put a stripe of every color you want to use right next to each other like I did in the picture below.
For this look I used Chanel 551 Coco blue, Essie Mint candy apple and Essie We're in it together. Gently stamp the sponge on your nail and move it up and down a little bit as you stamp. This way the colors will blend together nicely. If the colors are not as bright as you wish, then let it dry for a minute and stamp on the colors again.
When the nail polish has just dried, apply a topcoat. When you do this immediately after the colors have dried but are still a bit sticky, they will blend in even more. After the top coat is all dry I thought it would be nice to add some glitter on top of it (Catrice Have an ice day). Don't forget to clean up the edges of your fingers. Good luck!
 |
| Close up end result |
Do you like gradient nails? Have you ever tried it?


